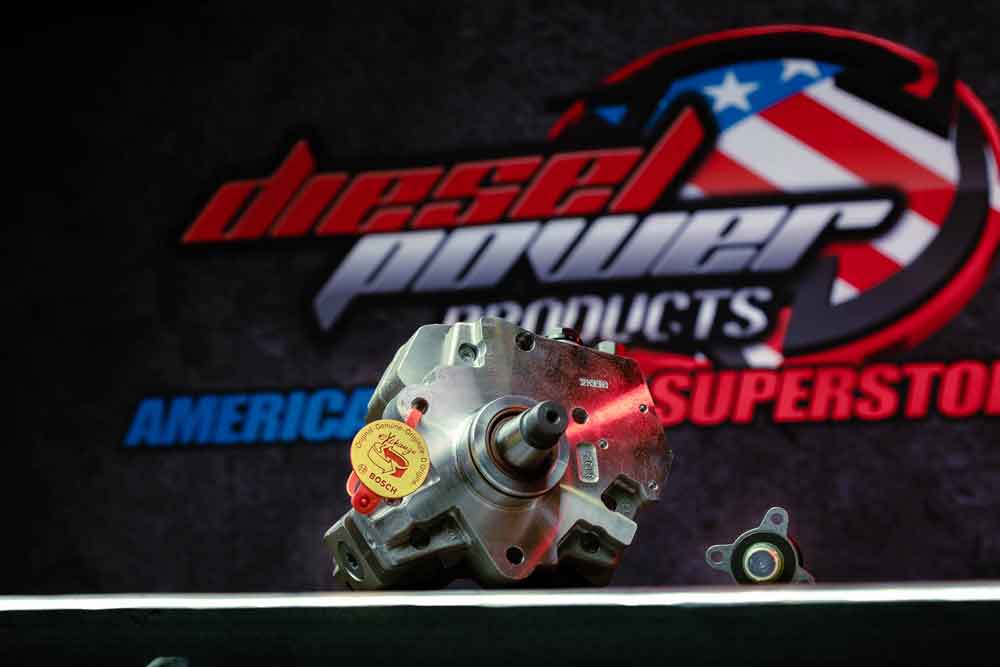
Common rail injected diesels have been around for over 20 years now, and the use of high-pressure direct injection allows the latest generation of diesel engines to run cleaner and produce more power than ever. Modern engines use sophisticated computer systems that monitor and control every aspect of the engine’s operation, central to which is the fuel system. Every common rail diesel uses a high-pressure injection pump, and over the last two decades, there have been several different pumps used from various manufacturers. The most common pump is the Bosch CP3, but a Bosch CP4 was also used, and the oddball pumps were the Siemens K16 and Denso HP4 (6.4 Powerstroke and L5P Duramax respectively).
One small and relatively inexpensive part that can cause a big headache on a common rail diesel is the valve that controls fuel flow into the injection pump. It’s known by a few different names, including fuel pressure regulator, metering unit, or fuel control solenoid, but technically the correct name is the fuel control actuator, or FCA. It’s a small part that can easily fit in the palm of your hand and only costs a couple hundred bucks, but it has a very important job to do, and when it fails, it can leave you with a rough running engine, or even a no start condition. While the part is inexpensive to replace (compared to an injection pump or fuel injectors) it can be very difficult to access on certain engines, so before you tackle the job to replace an FCA, it’s a good idea to know how to properly diagnose and replace a fuel control actuator.
What is an FCA and How Does it Work?
So, what exactly does an FCA do, and how does it work? In simple terms, the FCA controls how much fuel is allowed to enter the injection pump, which in effect controls how much pressure the pump can develop. It works in exactly the same way as a throttle valve does on a positive displacement supercharger; by regulating the inlet flow you can control the output pressure and volume. Even though the pump is turning, if very little fuel is allowed to enter the pumping chamber, you will have minimal fuel pressure delivered to the rail, or conversely, if inlet to the pump is unrestricted, it will produce its maximum pressure, even at a low engine speed.

The FCA is controlled directly by the engine control module, and it’s a simple solenoid design that uses a small amount of current to open or close the valve. With no voltage applied (or the electrical connector disconnected) the solenoid will default to fully open, inlet fuel flow will be unrestricted, and the pump will be allowed to produce maximum rail pressure. When the PCM commands lower fuel pressure, greater voltage will be applied to the solenoid, the valve will close to its predetermined position which restricts inlet flow and limits rail pressure. Depending on throttle input from the driver (and the specific model of pump) fuel pressure can range between 5,000psi at idle and 28,000 psi or more under full load.
Symptoms and Diagnosis of a Failing FCA
Like a lot of electrical components, there will be symptoms of a failing FCA to let you know something is wrong. Usually, you won’t be left stranded on the side of the road with a no-start condition, but it is possible. More often you’ll have a rough or low idle speed, the engine may stall as you lift off the throttle, there will be surging with steady throttle input, or you will hear a knocking or rattling sound from the engine due to excessive fuel pressure. Sometimes (but not always) there will be a check engine light that comes on with a code for low rail pressure, too high rail pressure, or for problems with the control circuit for the FCA.
If you do suspect a failed FCA and the engine still runs, one simple test would be to fire it up and use a scan tool to log commanded fuel rail pressure along with actual fuel rail pressure and compare the two readings. Rev the engine or take a short drive, and if your actual fuel pressure closely matches what the ECM is commanding throughout its entire range, the FCA is doing its job and is not the issue. However, if your fuel pressure is lower than commanded at idle, one simple test is to unplug the wiring connector going to the FCA. This should cause rail pressure to immediately jump up to 26,000 psi or so, and if it does, that’s a strong indicator the FCA is failing and needs to be replaced.
Because a genuine Bosch replacement is not terribly expensive, most people just shortcut any additional diagnostic steps at this point and throw on a new FCA. I normally don’t condone using the ‘shotgun’ approach to vehicle repair as it’s a gamble that can get expensive, but the odds are pretty good that a new FCA will solve your problem. Just be warned however, there are a few other problems that do occur which can be masked with the ‘unplug’ test. The FCA is an electrical part controlled by the PCM, and there are several other components that all need to work in concert with one another to correctly regulate fuel pressure, and when you unplug the connector, you may be overlooking a potential problem with the pins inside the connector, a broken wire, a short to ground, a short to voltage, or even an issue with the computer itself.
If you choose to verify your hunch and gather a little more evidence, an easy test is to disconnect the harness from the FCA and connect a test light between the two wires in the harness. Turn the ignition to the run position, but do not start the engine. Within about 20 seconds, the ECM will perform a self-test routine which will cause the light to brightly illuminate for a second. If the light comes on, this verifies all components downstream of the FCA are operating like they should, and further supports the theory of a failed FCA. If you get a dim flash of the test light, or no illumination at all, the wiring or ECM could be at fault. To further test the circuit, you’ll have to disconnect the plugs on the ECM and use an electrical multimeter to measure the resistance of the wiring between the FCA and the ECM. If you have more than 10 ohms of resistance or no continuity at all, that means there is a problem inside the wiring harness with either a broken wire or two wires shorting together. Take a close look at the outside of the harness to see if there are any obvious signs of chaffing, damage, or cut wires, and repair as necessary. Rodents love chewing on wiring, so also look out for any signs of animal activity under the hood like leaves, acorns, shredded insulation or more. If you can’t see any damage to the harness, double check that you’re testing for continuity on the correct pins, and either disassemble the harness and continue to look for damage one wire at a time, or just replace the harness altogether.

If you do have the correct continuity on both wires going to the FCA but still have no voltage coming from the ECM, chances are the driver on the circuit board has fried and you will need to replace the ECM altogether. This is probably the least likely scenario, but it has happened.
FCA Replacement on a Cummins
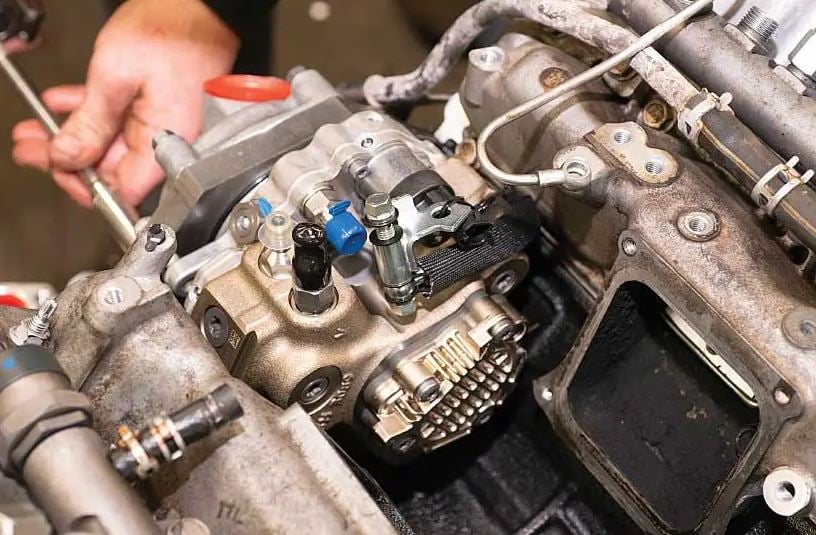
If you need to replace an FCA on a common rail Cummins, you are in luck because this is about the easiest repair you will ever take on. It’s mounted on the back of the injection pump, which is low on the driver’s side of the engine, toward the front and just above the level of the frame rail. The FCA is held to the pump with three torx T25 screws, but to get proper tool engagement, you will need a longer torx bit. The only ‘gotcha’ for a job like this is making sure you don’t strip out the head of the torx screws, so take some time and clean out the heads of the screws with brake cleaner and compressed air to make sure no grease or dirt can prevent the tool from fully engaging. Also, while you’re cleaning make sure there is no loose dirt or debris that could fall into the pump once you remove the FCA. Once all three screws are out, simply pull and twist the FCA out of the pump, lubricate the O-ring seal on the new one, and push it into place. You can reuse your old hardware if you must, but it’s cheap insurance to just replace the three T25 screws along with the FCA. Whether you have a CP3 or CP4 injection pump on your Cummins, the replacement steps are pretty much the same, except on a CP4, the FCA may be called a regulator, and its only held in place with two screws instead of three.
FCA Replacement on a Duramax
From 2001 to 2010, the Duramax V8 used a Bosch CP3 injection pump, and from 2011 to 2016, it got the updated Bosch CP4. The diagnosis and replacement steps are pretty much the same whether you have a Cummins or a Duramax, but the big difference is accessing the pump to replace the FCA. The injection pump on a Duramax is mounted in the valley of the engine, between the two cylinder heads, and its driven by the top of the cam gear. Unfortunately, GM mounted a lot of other parts on top of the injection pump which will make your job a lot more difficult than it is on a Cummins. Every model of Duramax uses slightly different plumbing so the steps will vary, but generally the procedure is the same across the board. There are a few coolant tubes in the way above the pump, some intake plumbing toward the back, sometimes there’s an EGR cooler that will need to be removed, and the AC compressor can be moved aside to get a little more room. Depending on how flexible you are and how creative you can get with your arsenal of tools, you may be able to shortcut a few steps and get the FCA removed from a Duramax in a couple hours. Once again, just be sure your Torx bit is fully seated before you attempt to loosen the fasteners, because if you strip out the bottom screw, the whole injection pump will have to come off to finish the job.
Powerstroke FCA Notes
The 6.7 Powerstroke (2011 and newer) uses the same Bosch CP4 injection pump as the LML Duramax and 2019-2020 6.7 Cummins. On a Ford, the pump is located in a similar position as it is on a Duramax, and just as you would expect, there are few things that need to be moved out of the way. On the 6.7 Powerstroke, the main components that need to come off are the upper and lower intake manifold, which luckily can be removed easily. Once you see the injection pump, the FCA will be sitting right on top ready to be replaced.
2007 and older Powerstroke engines use an HEUI injection system which does not have a high-pressure injection pump or an FCA valve, but the 2008 to 2010 6.4-liter Powerstroke is a special case. They used a Siemens K16 which is one of the highest flowing injection pumps used in a pickup truck, and they operate in a similar manner as the Bosch pumps, but instead of a single FCA, they use two solenoid valves that control pump output. There is a pressure control valve (PCV) and a volume control valve (VCV), both of which can fail. The K16 pump is located in the rear of the block, but it’s underneath a valley cover which sits behind the compound turbos, so accessing it is a total nightmare, and unfortunately, if either solenoid or valve fails, you’ll have to replace the entire pump since the valves are not considered a serviceable item by Ford.
CP4 Upgraded FCA
If you’re familiar with the CP4 injection pump, you know they can cause major headaches with the fuel system if they fail, and the collateral damage gets very expensive. We have an entire article dedicated to repairing this problem, but it’s worth mentioning here that if you need to replace an FCA on a CP4, there are a few optional upgrades that can save you tons of money if the CP4 does self-destruct. For an LML Duramax, Exergy offers an FCA with a fine mesh screen that will trap any debris before it enters the rest of the fuel system, and for a 6.7 Powerstroke, S&S offer a fuel re-route and filter kit that installs between the FCA and the pump. Neither option will prevent a CP4 from failing, but they will save the rest of your fuel system, which is a great insurance policy.
Sooner Or Later, You’ll Replace an FCA
If you own any common rail injected diesel long enough, there is a very high likelihood that you’ll experience an FCA issue at some point in time. In terms of prevention, there really isn’t a ton you can do, but it is said that a clean fuel system can extend the life of your FCA. You should be changing your fuel filters regularly, and if you have a FASS or Airdog lift pump, this will ensure nothing but the cleanest fuel passes through the FCA, minimizing chances for failures caused by contamination.
Also, running a fuel additive which increases lubricity like F-Bomb is good practice for a long-lasting fuel system, but because the FCA does have moving parts inside, the extra lubrication provided by F-Bomb could help prolong its life. Luckily, if your FCA does fail, genuine Bosch or Mopar replacements are readily available for your Duramax or Cummins, and the best part is they are one of the most affordable parts of your fuel system to replace.
When I plug the FCA Cummins QSL9 automatically shut down
The 2018 6.4L SRT engine motor is a beast of an engine, packing 707 horsepower and 650 lb-ft of torque. Has a standard transmission, an eight-speed TorqueFlite automatic which delivers fast and smooth shifts in Sport mode.
SRT ENGINE
so what can cause when you unplug the FCA that nothing changes (stays at these values below)?
truck at idle
2600psi +-
rail 14500psi +-
My 2006 cummins 5.9 quits and wont start when reaches operating temp., try to start, wont but there is a ticking sound coming from fca and no fuel pressure Leave sit until engine cools and engine starts fine, good fuel pressure but warms up and stops, same thing happens, replaced fca does same thing. any advice. Certainly enjoyed your article, thanks for your time. Could be wiring or bad ecm eh. Again thanks for the article.